10 Easy Steps to Start Your First Garden
Begin your gardening journey with our simple 10-step guide. Learn how to start your first garden and grow your herbs, vegetables, and flowers. https://mrpo.pk/green-living/
Starting your first garden can be a thrilling experience, with these 10 Easy Steps to Start Your First Garden can also be overwhelming, especially for beginners. With so many options and considerations, it’s easy to get lost in the process. However, with a little guidance, you can create a thriving garden that brings you joy and fresh produce.
As a novice gardener, it’s exciting to start building your gardening toolkit. Here are the essential gardening tools to get you started:
- Gloves: Protect your hands from thorns, prickles, and dirt with a good pair of gardening gloves.
- Trowel or Small Shovel: For digging, planting, and mixing soil.
- Rake: A fan rake or leaf rake helps with soil preparation, leaf removal, and even mulch distribution.
- Hoe: A long, flat hoe is perfect for weeding and cultivating soil.
- Watering Can or Hose: A watering can is great for small gardens, while a hose is more suitable for larger areas.
- Pruning Shears: For trimming and pruning plants, shrubs, and trees.
- Garden Fork: A long-handled fork for turning over soil, aerating, and composting.
- Measuring Tape or Garden Measure: To measure plant spacing, garden beds, and layout.
- Garden Kneeler or Knee Pads: Protect your knees while working on the ground.
- Garden Cart or Wheelbarrow: For transporting plants, soil, and other gardening essentials.
- Hand Cultivator: A small, handheld tool for weeding and soil preparation.
- Soil Test Kit: To monitor soil ph and nutrient levels.
- Garden Labels: To identify plants and keep track of your garden layout.
- Twine or Garden Tie: For supporting plants and keeping them upright.
- Garden Knife: A versatile tool for various gardening tasks.
Remember, you don’t need to buy all of these tools at once. Start with the essentials and gradually add more as you gain experience and confidence in your gardening skills. Start Your First Garden
Find the Best Location for Your Garden
Start Your First Garden in your backyard with big garden beds and plenty of sunlight would be a gardener’s dream, but it’s not a requirement to have a successful garden. It’s possible to grow herbs and vegetables in small spaces, like on a balcony or even on a windowsill.
If you don’t have a yard or home suitable for gardening, consider joining a community garden.
Step 1: Choose the Right Location
Your garden location decision needs to include both local sunlight exposure and expected rainy weather patterns. You need to provide at least six hours of active daytime sun for growing both vegetables and flowers together. Look for an area where a flat surface meets correct drainage conditions to avoid heavy water-soaked soil patterns.
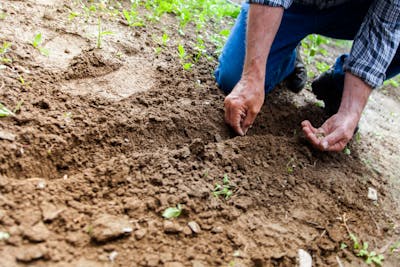
Step 2: Prepare the Soil
A proper preparation of planting soil must be completed before planting takes place. Clear away debris from your garden soil before you till it deeply to 8-10 inches while adding organic materials, including compost or manure. The addition of organic matter improves the combination of fertile elements and proper soil structure.
Step 3: Select Easy-to-Grow Plants
New gardeners should begin with basic herbs and flowers while learning about tomato and zinnia plants, along with cucumbers in combination with basil and mint. Several beneficial plants survive with minimal care requirements because they demonstrate tolerance to common mistakes.
Step 4: Plan Your Garden Layout
Organise your design and start your first garden in a way that verifies the optimal use of available space. Partner plants in companion planting arrangements provide beneficial outcomes for mutually growing crops. By placing marigolds next to tomatoes, you can protect your tomato plants from nematodes.
Step 5: Start with Seeds or Seedlings
Your garden begins as a seed planted or starts with seedlings. Seed planting costs less money, and seedlings help your plants start faster. People who are beginning their gardening journey should start with seedlings instead of planting from seeds.
Step 6: Water and Mulch
To support plant growth, two essential elements are adequate watering combined with appropriate mulching practices. Plants need deep watering only two times during each week, assuming heavier-than-average rainfalls. Mulch functions as a moisture-retention tool that also blocks weed growth while managing soil temperature parameters.
Step 7: Provide Adequate Sunlight
To conduct photosynthesis, most plants need direct access to sunlight. Direct sunlight should be accessible to your garden and supplement your light source by using grow lights as needed.
Step 8: Learn to Identify Common Pests
Plant insects, including aphids, whiteflies, along slugs, often cause damage to your garden plants. Stay informed about pests in your area so you can choose organic pest controls, including neem oil and insecticidal soap and hand-picking as treatment methods.
Step 9: Use Organic Fertilisers
Organic plant feed comes from compost and manure as well as fish emulsion solutions. These plant supplements promote both plant health and growth and soil quality enhancement.
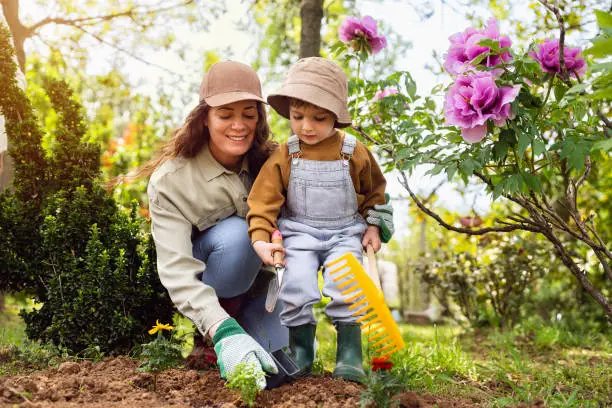
Step 10: Maintain and Enjoy
Gardening is a continuous process. To keep your garden healthy, you must consistently water it as well as maintain selective pruning and pest monitoring schedules. As you absorb the advantages of your horticultural labour, you should distribute your collectables to loved ones and friends.
You can develop an abundant garden which provides fresh produce along with happiness through these 10 basic steps. Happy gardening enjoins you to stay patient and understand your mistakes as you move forward.
You can both improve your environmental record and establish sustainable gardening practices by producing organic fertilisers. Here are some simple and effective methods to make organic fertilisers at home:
1. Compost Fertiliser
Keeping fruits, vegetables, tea bags, and coffee grounds comprises the process of making compostable materials.
Your fertiliser mix should include brown components, including dried leaves, along with straw and shredded newspaper.
After mixing the materials, you should place them in a pile to decompose for 2-3 months.
When your compost reaches maturity, you should utilise its fertile content to enhance your planting soil.
2. Manure Tea
Home fertilisers can be created from animal barn waste consisting of chicken droppings and cow manure, or horse dung.
You need to mix one part of manure material with ten parts of water.
Let it steep for 24-48 hours
After creating a solid fertiliser from your mixture, allow it to strain before using the liquid product directly on plants.
3. Worm Casting Fertiliser
Set up a worm composting bin
Pour red wiggler worms into your worm composter together with kitchen scraps.
After 2-3 months of maturation, extract the beneficial worm castings as fertilisers
Use as a fertiliser
4. Fish Emulsion Fertiliser
Birds fish waste like bones, skin and organs for future use.
Mix with water in a 1:10 ratio
Let it decompose for 2-3 weeks
The liquid fertiliser solution forms after straining material from this application.
5. Bone Meal Fertiliser
Gather either chicken bones together with beef, or fish bones.
Powder the bones by drying them first before grinding them
By combining worm castings with water in diluted concentration, users obtain a valuable liquid fertiliser.
Alfalfa Meal Fertiliser
Collect alfalfa leaves or pellets
Use water to make a liquid fertiliser option
High in nitrogen, phosphorus, and potassium
7. Epsom Salt Fertiliser
To make the fertiliser solution, combine 1 tablespoon of Epsom salt with 1 gallon of water.
This fertiliser delivers sulfur together with magnesium to vegetables.
8. Banana Peels Fertiliser
Plant banana peels into the earth surrounding the base of your plants.
Rich in potassium, magnesium, and sulfur
9. Eggshell Fertiliser
You need to crush eggshells before adding water to them.
Plants extract calcium with essential mineral nutrients when applied to them.
10. Green Sand Fertiliser
Green sand, which can be obtained from glauconite deposits, provides a useful organic fertiliser.
Alfalfa leaves or pellets mixed with water will produce a homemade liquid fertiliser.
Rich in potassium and other minerals
When using organic fertilisers, implement them sparingly together with other gardening techniques to achieve maximum benefits in your efforts.
- Here are some additional gardening tips:

Use Crops to Repel Pests
Troublesome garden insects stay away from both marigolds and nasturtiums, which protect nearby plantings. Plant beneficial crops with vegetable plants to protect your vegetables from pest insects.
Create a Pollinator-Friendly Garden
Plant flowers which welcome bees, together with butterflies and pollinators, to boost your crop production. The selected garden arrangement helps protect native wildlife in the area.
Use Grey Water
The collected grey water from sinks, showers and washing machines serves as an efficient irrigation solution to keep your plants healthy. Fitting mulch layers on the surface will help prevent waste in water solutions and maintain economic gardening water consumption. - Mulch with Straw
Straw mulching provides excellent moisture retention while keeping weeds under control and achieves proper soil temperature control. This material remains inexpensive while being easy to acquire.
Grow Companion Crops
Several crops achieve enhanced development by sharing their growing location with other plants. When beans grow with corn and squash, they form useful symbiotic bonds which help growth while controlling pests. - Monitor Soil ph
Soil tests should become frequent to confirm the best conditions for plant growth. Plants grow best in acidic or neutral soils where the ph ranges between 6.0 and 7.0.
Use Diatomaceous Earth
Natural organic diatomaceous earth functions as a plant-safe powder that both dries out and kills pests such as slugs and snails. The powder is used as a protective barrier around specific garden plant areas. - Create a Garden Journal
Maintain detailed records which combine your garden evolution with weather observations and observations of plant growth. Plant growth monitoring alongside environmental records creates insights that influence upcoming gardening decisions.
Vertical Space
Vertex plant grow systems, which combine arbours and wall-mounted planners along with trellises, let gardeners grow vining crops, including beans, tomatoes and peas, while conserving all available space.
Learn to Identify Beneficial Insects
Not all insects are pests! By identifying helpful insects such as lacewings and ladybug,s you can preserve an ecosystem balanced by natural predators.
